Emulation
has been around for practically as long as computers themselves, it's
the process of running software designed for one system on another by
recreating the proper hardware on a software level.
It sounds
pretty complicated, and it was until recently. Thanks to an amazing
piece of software called OpenEmu, it's now possible to emulate nearly
any classic console, from the NES to the Sega Master System, using your
Mac, and in this tutorial, I'll show you how to do just that.
Screencast
The Legal Question
There's
some good news and bad news here when it comes the legality of video
game emulation. Starting with the good news, ROM's are just files and
therefore are not illegal in and of themselves. In fact, the OpenEmu
project provides a free ROM Starter Pack which includes homebrew ROMs for consoles ranging from the original NES to the Game Boy Advance.
From
there, unfortunately, the water get significantly more murky. Although
it's technically legal to have a second copy of games you own for archival purposes, it's still illegal to download ROMs of these commercial games from the internet.
For
anyone familiar with the legal issues surrounding ripping DVD's, this
should come as no surprise. As with DVD's, owning a copy of the games
you're emulating should put you morally, if not 100% legally in the
clear.
For a comprehensive overview of the legal and moral
issues surrounding emulation from the perspective of the content
creators, check out the Intellectual Property Rights guide from Nintendo.
The Hardware
While
all the games I've played for this tutorial work just fine with a
keyboard and mouse, you'll get the best experience by using some sort of
controller. A quick search on Amazon will turn up an ample selection of replica controllers which work via USB.
While
these are a great option, if you're looking for an emulation experience
that's as authentic as possible, Amazon also stocks a variety of
adapters that will allow you to hook up your original classic console
controller to your Mac via USB. The adapters alone will run you around
the same amount as any of the USB native replicas so this solution is
only really cost effective if you already own an original controller.
A
final bit of advice when it comes to selecting your controller(s) of
choice: if you're looking to save money or simply consolidate the number
of cords running from your Mac, aim for a controller with the most
buttons.
For example, playing an NES game on a Super Nintendo
controller works just fine, but doing the reverse would be nearly
impossible as you would be missing the X and Y buttons in addition to
both shoulder triggers.
If you're set on using multiple controllers, purchasing a USB hub and a cable management solution like this cable management box, from Ikea, will do wonders when it comes to keeping the controller mess to a minimum.
Getting Started With OpenEmu
While
emulating classic consoles on your Mac used to entail installing an
individual emulator for each console, an application called OpenEmu has dramatically simplified the process by consolidating around a dozen of these emulators into a single, easy to use package.
Installing OpenEmu
OpenEmu
acts as a one-stop hub for everything involving emulation on your Mac,
allowing you to emulate a variety of classic consoles, organize your
games into collections, map your controllers, and more.
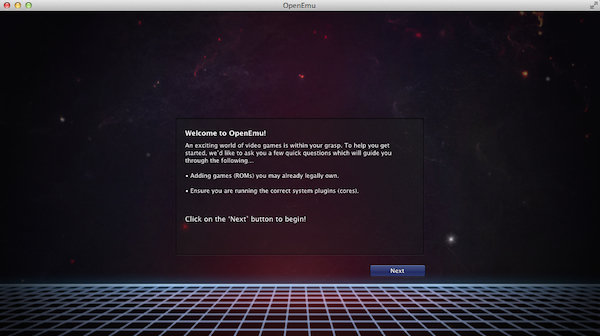
OpenEmu greets you with an easy to use setup process.
Navigate to the Downloads folder and open the OpenEmu .dmg file.
Drag the OpenEmu Application to your Applications folder.
Navigate to the Applications folder and launch OpenEmu.
After passing through the initial welcome screen, you'll be be met with a screen called System Cores Installation,
that's geek speak for the consoles you want to play on your Mac. Scroll
through the list and check the ones you'd like to install. Then, press Next.
Now,
you'll be prompted to scan your Mac for any ROM files that might be on
your Hard Drive. If you're not sure whether or not you have any, just
check Allow OpenEmu to Scan for Games and click Next, it'll take care of the heavy lifting for you.
Setting up the Controller
While
OpenEmu is working in the background on the final setup process, you
can begin to customize the controls to our liking. Whether you're using a
USB controller or a keyboard, OpenEmu will automatically configure many
of these controllers and includes a default keyboard map familiar to
any gamer.
This works as a great starting point, but OpenEmu makes it extremely easy to dive right in and fine tune the controls.
Navigate to Preferences under OpenEmu in the toolbar.
Select Controls. Select the console whose controls you wish to customize from the dropdown menu on the right.
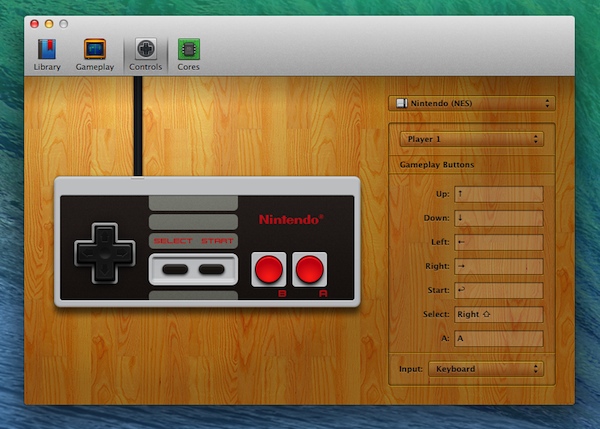
You'll
be prompted with a diagram of your selected controller. To the right of
that diagram is a list of gameplay buttons. Select any field with your
mouse and hit the button on your keyboard or controller you'd like it to
correspond to.
Customizing controls is easy in OpenEmu.To customize the controls for more than one controller, select the dropdown menu labelled Player 1
as the default option and select the player whose controls you'd like
to customize. When you're finished, just exit the Preferences window and
your changes will be automatically saved.
Advertisement
Ready Player 1
Now
that you've got all the heavy lifting out of the way, it's time to
finally play a game. If OpenEmu found any ROMs on your hard drive,
they'll now be displayed in the Main Window. If you're still looking for
ROMs to use, PDROMS is a wonderful site with downloads of thousands of free and legal home-brew ROMs.
The final product: OpenEmu running Super Mario Bros. 3.
If OpenEmu wasn't able to find the ROM you wanted to play, simply drag it to main window and it'll be automatically imported.
You'll
notice that ROMs might not display to proper cover art, this can be
easily fixed by right clicking on the title in question and selecting Download Cover Art, OpenEmu will then search the internet for the best available artwork.
Once that's out of the way, playing a game is as simple as double-clicking it's artwork.
When
you've finished playing, OpenEmu supports two ways of saving your game.
Firstly, through the game's built in save function, and second, by
saving the emulation state at any given point. This incredibly powerful
feature can be accessed by pressing Command-S at any time. The next time you open your game, it'll resume to that exact point.
Game Over
OpenEmu
is an amazing tool that's made emulation available to those without
bachelors degrees in Computer Science. By following the steps in this
tutorial, you're now able to relive the experience of almost any classic
console right on your Mac.
What games are you most looking forward to (re)playing? Let me know in the comments below.
Unknown
Lorem ipsum dolor sit amet, consectetur adipisicing elit, sed do eiusmod tempor incididunt ut labore et dolore magna aliqua. Ut enim ad minim veniam, quis nostrud exercitation.
Medical Disclaimer
The information on this site is not intended or implied to be a substitute for professional medical advice, diagnosis or treatment. All content, including text, graphics, images and information, contained on or available through this web site is for general information purposes only. Krobknea makes no representation and assumes no responsibility for the accuracy of information contained on or available through this web site, and such information is subject to change without notice. You are encouraged to confirm any information obtained from or through this web site with other sources, and review all information regarding any medical condition or treatment with your physician. NEVER DISREGARD PROFESSIONAL MEDICAL ADVICE OR DELAY SEEKING MEDICAL TREATMENT BECAUSE OF SOMETHING YOU HAVE READ ON OR ACCESSED THROUGH THIS WEB SITE.